Friday, September 28, 2012

Book Review: "How the Hippies Saved Physics" by David Kaiser

I'm always excited to see a new science book available for checkout from the library online.  Especially since I'm still elbows deep in Stephen King's The Dark Tower Series.  

So I read (listened to) How the Hippies Saved Physics: Science, Counterculture, and the Quantum Revival by David Kaiser.


If nothing else, this book reminded me that I am, at my Core, an Engineer.  The book covered the fringe physics research from about the 1950's through present day.  I don't like fringe.  That's not entirely true, but I can solidly and easily place myself among the critics throughout the book who thought that studying parapsychology and ESP as scientific amounted to basically nonsense.  I can't help myself.  I like Newtonian Physics.  I like things I can see, touch, understand and break down to pieces that make logical sense to me.

I am, however, willing to accept that this particular rigid and logical way of thinking isn't what develops new ways of looking at the Universe and the basic make up of matter.  In college, things like Bell's Theorem and non-locality gave me a headache.  This apparently hasn't changed much.  Even in the context of a pop audio book when things go too far out for me, I simply zoned out for a few minutes until it came back to something I could relate to a bit better.

Discovering that some of the theories of Quantum Physics were first explored and discussed by hippies on drugs and lounging naked in hot tubs doesn't really help legitimize it in my mind.  I refuse to accept that mind altering substances of any ever kind reveal any type of greater understanding of the universe.  My world view insists that I believe that any type of understanding comes from hard work, and clear headed thinking.  But I'm an engineer and the world benefits from me holding this position.  I'll leave the mind altering drugs and consequent 'discoveries' to the philosophers, artists and fringe physicists. 

Monday, September 24, 2012

The Nursery Project: Step 3 a, Furniture

The last few weeks we've been working diligently on Nursery furniture.   It probably seems a bit odd to buy furniture we aren't even intending to use right away, but we've learned from experience that failure to furnish builds on itself until you've been in your house for 4 years and you still don't have furniture in your master bedroom....

We are on our second set of furniture.  The first set, which was specifically for a nursery was awful.  I think it was by Graco, but the problem was the dresser.  It was tiny and the drawers hardly opened at all!  The dresser we bought now is probably too big for a little guy, but a little guy is going to turn into a small guy who's going to turn into a bigger guy who will just keep growing and growing... (especially if his early growth is any indicator!)  Actually the other day I was picturing the dresser covered in skateboarding and sports stickers placed haphazardly by a teenager...

I also wanted some shelves in the closet.  When we moved Big Buck Hunter out of the other guest room, we installed wiring shelves which work pretty good, but it was a hassle and we decided we didn't really want to deal with it this time.

So here's photos of our latest progress!

Back half of the Closet (we added the second rail)

Front half of the closet

Furniture and Furry Friends!

The closet organizer is a section from Ikea.  (It's called Stuva).  I like the system because it's adjustable.  I'd originally wanted it to be a little bit shorter to allow for use of the rod above it, but we decided to add another rod to the back of the closet so we maintained approximately the same amount of rod space (technically it increased a few inches).  We also have the large dresser, so clothing storage shouldn't become a problem!  All of the clothes he owns are currently hanging in the closet in the picture shown above, so it looks like it will be a while before we fill it up!

We don't have a mattress yet.  We actually chose one yesterday, but decided it would be better to wait until it was on sale or we had a coupon (it's at Babies R Us and they send us a million coupons) since we won't be using it for a while anyway.

While they aren't furniture, they are pictured above... the animals are my favorite.  While you can't quite tell yet since the decor is just starting to come together, we decided to go with a jungle theme.  I feel in love with the Melissa and Doug Giraffe but I kept telling Gavin it was a bit ridiculous to get it.  I was telling my mom about it and she fell in love with the Lion (she's a big fan of Aslan of The Lion, the Witch, and The Wardrobe, and more importantly Who he represents).  As soon as the moratorium on shopping was lifted, he arrived on our doorstep, baby's first present!  Gavin decided he wanted the Giraffe too, so now baby will have two jungle friends to grow up to!

Penny doing her best Giraffe Pose

This is labeled Step 3 a because we are not done.  We are still searching for a book case and a chair.  (In the meantime, the closet organizer is serving as a bookshelf, but I'm hoping to quickly have too many books for this to be a long term solution!)  We also have a changing table that I didn't post any pictures of (primarily because it was covered in drills, hammers, and other miscellaneous hardware!).  I am excited to start working earnestly on the finishing jungle touches in the coming weeks!

Thursday, September 20, 2012

Book Club: Succeed Because of What You've Been Through by Rhonda Sciortino

If it seems WAY too soon for another Book Club book review it's because the last one was out of order. I read October's book before September's!  Luckily for me this month's book was a short easy read and I've had a decent amount of down time to read.

This month's book was Succeed Because of What You'e Been Through by Rhonda Sciortino.


I put off purchasing and reading this book.  I suppose it's partially because I'm still working through The Dark Tower Series, but I also just wasn't in the mood for a self help book.  A surprising fact given the shear volume of self help books I've read over the years.  I think part of the problem is that I was put off by the title.  "Because of what I've been through??  What does it matter what I've been through?  Succeed because you put your body and spirit into it, it doesn't matter what's in the past!!"  Turns out that's kind of the point behind the book.

Overall, I think the book had some very good points.  It's the type of book I would have read in college and enjoyed, although at some points it was a little too "Law of Attraction" heavy for me.  While it has always been my belief that hard work and perseverance will pay off and are the only way to success, it has never been my belief that hard work, even coupled with REALLY believing, can guarantee you achieve ALL of your financial and personal goals.  I guess I'm just too much of a pessimist for that.  Too much of life is out of our control for me to believe that, although I'm totally on board that hard work, sacrifice, changing negative past behaviors, letting go of mistakes and recognizing the cost of your goals will get you closer to your goals than you are now.

I was also impressed with the author's ability to state the facts of her past without hosting "The Pain Olympics."  The Pain Olympics is a concept used sometimes in my grief group.  The idea is that it's easy to look at other's and insist that my hurt is worse than your hurt.  From the outside it's easy to make these types of judgement, but they are useless, hurtful and inaccurate.  Everyone has faced their own unique set of challenges.  Some of us have been luckier than others, but everyone has fought their own battles and faced their own demons.  

Personally, what I took from the book was a relatively small exercise.  I'm trying to look at negative things in a more positive light.  In particular, to phrase them verbally in a more positive light.  I'm creative and I can creatively describe the same situation in lots of different lights.  My goal is to actively work on using brighter lights for darker moments.

I'm looking forward to tonight's discussion.  I'm interested to learn more about the women in my book club.

Thursday, September 13, 2012

A Late Anniversary Post

A month and a half ago, Gavin and I celebrated our two year wedding anniversary.

Our Wedding
Our Amazing 1st Anniversary Trip

This year, travel wasn't really an option, but we had an opportunity to revisit Club 33, the secret club at Disneyland where we had our magical wedding rehearsal dinner.

The policies have changed and unfortunately the dining experience no longer includes park admission for the day which greatly increases the costs of a visit.  Still, we thought it would be a lovely way to spend our anniversary.

I love Disneyland and I know all of my favorite spots and attractions.  Being pregnant, many of those were off limits.  Instead of being a disappointment, it was like visiting the park with entirely new eyes.  We watched parades, walked around areas I hadn't been in years, had a leisurely lunch and relaxed in the shade people watching.  It was a lovely day.


Fell in love with this adorable little Robot Asimo


New Angle on an old Favorite


There were about 10 rows of strollers... scary
After spending the day in the park, we headed to Club 33 for our 8:00 reservation.  We had a long and lovely dinner.  Everything was as good as last time (except maybe the creme brulee).  We even managed to catch part of Fantastmic from the window next to our table.  It was a wonderfully romantic day together.  After dinner, I was like a little kid again wanting to see everything again and not wanting the day to end.  We kissed under the fireworks and I thanked God for sending me someone so amazing to spend my life with.

The two years since our wedding haven't gone as planned, but because I've had Gavin's support and love, I've survived.  

I love you Gavin!

Tuesday, September 11, 2012

Crochet Projects Everywhere!

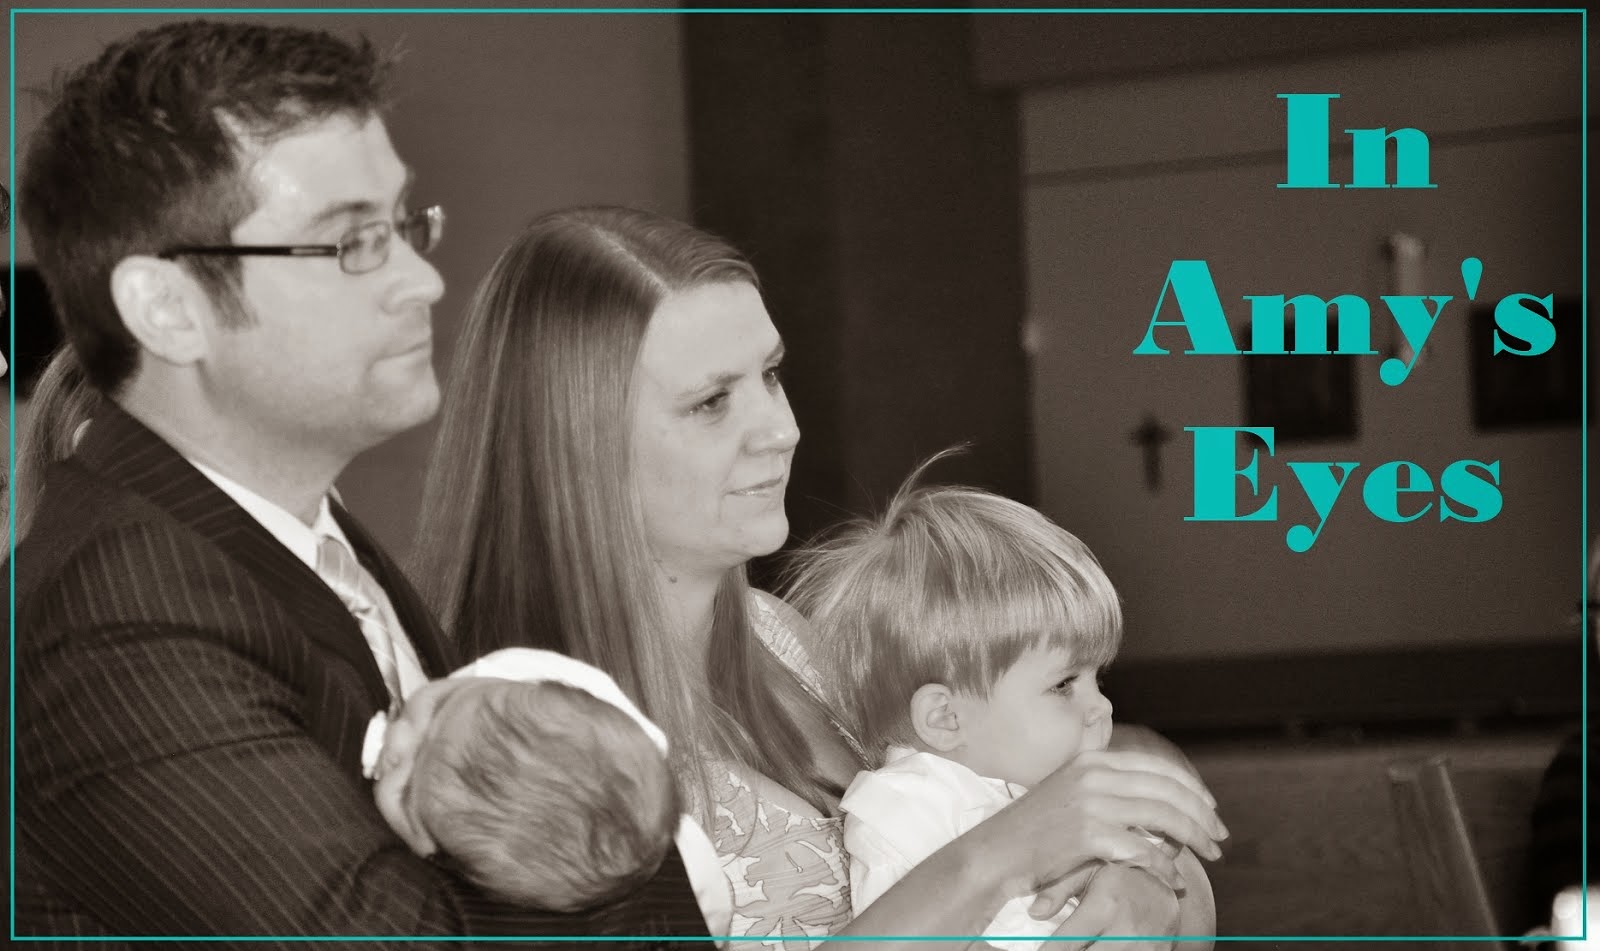
This year I've spent some time on bed rest and even more time on 'rest' so I've had lots of time for crochet projects!  I'm pretty sure the projects were one of the few things (behind my mom and husband!) keeping me sane for a while!  I typically can't sit and watch a movie or a tv show, but with a project in my hands, it's much easier to sit and relax, with or without the TV.  (While I was on bedrest I watched almost all of the old episodes of The Twilight Zone on Netflix!)

The first project I finished was a baby blanket.  Every time I've been pregnant, I've made a blanket.  It's the one things I allowed myself.  So the day after we found out we were expecting, I chose a yarn in a rainbow color (Bernat Baby Coordinates "Baby Baby")  I started the blanket immediately with the only stitch I really knew at the time: double crochet.  I finished the blanket a few months ago and I'm very happy with the results:


As you can tell from the fact that it's pulling itself down, it's a bit heavy.  Or it's just smiling like my model behind it! :)

Since I started it long before we knew what gender our miracle would be, the fabric is white, pink, blue, yellow and green.  After we found out, I choose a border that I thought brought out the historically gender specific colors:  (Spoiler alert!)  This is also the first project I've done where I added a border and I think it makes a huge difference in the finished look of the project.


I love the rainbow blanket for our rainbow baby!

With one project done and lots of down time remaining, I started my 'giraffe blanket.'  For some reason, I've developed a love of giraffe's the last 6 months or so, probably partially because of a lunch I had with one at the Living Desert in Palm Desert.  When I got to the fabric section, I suddenly couldn't completely remember what colors giraffes are.  I found a stuffed one in the toy section, so my giraffe is Chocolate and Banana colored although I've since realized that most stuffed giraffe and yellow and orange.


Compared to the last fabric, these were super easy to deal with.  Still very soft, but they didn't try to unravel and I rarely found myself with my needle in the middle of a piece instead of underneath.  Also, for the first time in my life, I branched out and tried 'a pattern.'  To call a basic granny square a 'pattern' might be a bit of a stretch.  I was skeptical because I like to veg out while I work and counting has never been my strongest subject.  The nice thing about a granny square is you really just have to follow the row before and count to three.  I thought I could handle that.  I don't know that I would try a granny square quilt blanket because the first two or three rounds are the annoying ones and doing them over and over again and then dealing with stitching them together seems like a huge hassle.  I think my tension is varying some because my blanket isn't perfectly square, but it could just need to be darned.


Because I decided to do two colors I had quite a few color switches.  I'd read you could pull a former color through, but I thought that it would make a visible line through the blanket and opted to tie off and weave in all of my ends.  It was a little time consuming and some of them are still peaking out.  I also debated doing a more elaborate edging, but left the final choice to Gavin after showing him several examples and he like this one best.

After my success with the granny square, I wanted to branch out more!  I figured I'd already done one animal themed blanket, I should continue!  I quickly realized lots of animals are brown, though, and I'd just finished this blanket.  So I decided to try a zebra blanket.

The pattern for this one seemed a bit tougher.  It took over a page... scary.

Red Heart Corner to Corner Throw Blanket
But it was a red heart pattern, so I thought it was still worth a try.  You start in one corner and work your way through, so you are always either adding or removing stitches.  It was good practice!  But since I thought I had a high probability of failure I decided to go with cheap yarns: Red Heart Super Savers in black and white.

Red heart is great to work with because unlike the nicer feeling yarns, it doesn't stretch or give much, but it's also much rougher.  I bought one skein of black and white and got to work.  When I say I followed the pattern, I mean that roughly.  I wanted to make it look like a Zebra, and the stripes on a Zebra vary, so each row I'd look at the blanket from a distance and decide if I should switch colors or continue with the one I was on.  The project helped me pass the time on two slightly less than ideal flights (to Vegas and to Chicago) and I was really enjoying it.  I overestimated the amount of yarn per skein and I haven't purchased more, so this project is still  technically 'in progress' although I haven't made any 'progress' in several weeks. (Update, after drafting this post, I was motivated and bought the rest!)


In other yarn news, I started Tight Knit!  We've met a hand full of times and I think it's been great!  It's just been a hand full of girls and we sit around and work on our projects and chat.  It's exactly what I'd envisioned.

Also, while I was in Chicago, I began to teach our god daughter how to Crochet.  It was fun, although I wish I'd had more time to go through a bit more with her.

Crochet has been on the back burner the last few weeks, but I'm sure it will be back when the weather cools down and I can stand the idea of a blanket touching me again!

Sunday, September 9, 2012

The Nursery Project: Step 2, Painting

With Step 1 complete, it was time to Paint!

With our theme in mind, we'd decided we wanted the top half (two thirds, really) of the room blue and the bottom green.  We've had blue and green paint samples laying around our kitchen for a month, and as soon as we were done with the chair rail, we took them upstairs and decided on colors.

Planning for painting!

Like with the Chair rail, I had a plan and it included buying and testing samples.  I'm no designer and a 3" piece of paper isn't quite enough to give me a feel for the color and samples are a cheap way to make sure you don't end up with something you hate.

We immediately fell in love with the blue.  The green, not so much.  We bought more samples until we'd decided on our colors.  The wall was looking a bit festive by then.
Our first samples
Some of these colors anyway....

Painting isn't that difficult, it's not even that time consuming.  PREPARING to paint is the hard part.  I divided it up into several days because I get tired very easily lately.  Sanding, cleaning, caulking holes and taping... We'd learned some from our first painting project downstairs and were much better prepared this time around.


Before
Before

Before (Just look at that lovely Chair Rail!)

This time around we opted to only tape the base boards.  We got some advice on brushes and bought a 1" and a 1.5" Purdy brush for trimming and had pretty good results.  The chair rail gave us a little bit of difficulty.

Gavin and I started on our own on Saturday with the blue only.  I helped trim, although once we started rolling, the paint smell was a bit strong so Gavin kicked me out.

Not before I took his picture!!

It took all day Saturday (with a break for 5 guys burgers) to trim the room and apply two coats of paint, but we had a great time together.  It's a little annoying that it takes hours and hours to trim and then the walls roll in about an hour, but the results were nice:

It's Blue!

On Saturday, we enlisted help.  Bobby and Heather came for Green Day!


The green was darker, and I had anticipated (correctly) that we would need three coats.  Unfortunately I still over estimated how much paint we would need and we ended up with a bunch of extra green paint!

Not enough Green!

I'd learned from our previous painting project that a central supply station/work area was important, so we set up a table.  I think it helped tremendously to keep the house clean and everything organized. 


I LOVE the results.


We aren't huge painters, and there are some rooms in our house that we will hire someone to paint (hopefully soon!) but the nursery isn't that large and it was great to be able to do it ourselves (I didn't help much on Sunday, truthfully, but I was there in spirit and in plan!)


Saturday, September 8, 2012

Book Club: Wild by Cheryl Strayed

I'm a month ahead in Book Club.  The book for next month was available via ebook from our Library (if you have an iPad, smartphone, or kindle, check your library's electronic section.  I'm surprised by all of the books available, audio and ebook format! Also, Sara do you know any other resources for electronic borrowing?)  There was a wait list, so I added myself and got the book early, so I'm a little out of sequence.

The book I read, next month's book, was Wild by Cheryl Strayed.


It didn't take me long to realize that I really didn't like Cheryl.  The copy I got from the library had Oprah's book club notes which were equally annoying to me.  Oprah commented on various passages and why she was so impressed with Cheryl's strength and independence.  I commented on various other passages about why I was so annoyed by her ability to blame others for most of her problems and stumble through life so unprepared (although it seemed to serve her relatively well, considering).  Not far into the book there was this, which I'm sure didn't help my general opinion of the author:
"I got an abortion and learned to make dehydrated tuna flakes."  Just another day in the life?

Still, the idea of an epic journey to give yourself a new perspective is exciting.  While I'd never heard of the Pacific Coast Highway, the places along the way (at least in the California part of the journey) are familiar to me and her descriptions are fantastic.  

Travel is a genre I've typically just skipped.  Although I love travel, the idea of reading about it always seemed boring to me.  But based on the travel books I've read, I'm thinking I should rethink that idea.  A few summers ago I read "The Geography of Bliss" by Eric Weiner and really enjoyed it.  So I can again thank book club for broadening my reading spectrum!

I also recently started Stephen King's "The Dark Tower" series.  I was midway through the 4th (and in my opinion by far the worst) book and welcomed a break!  If I ever get through the series, I'll write a review.

Friday, September 7, 2012

The Nursery Project: Step 1, Chair Rail

We've had a nursery in our house since the day we moved in.  I can't remember what the nursery set up was anymore, but even after we moved in the color was clearly very nursery-ish and since we had three 'guest rooms' we had to come up with ways to distinguish between them.  The Nursery eventually became The Round Room when we purchased a round bed, a round light, and a round mirror to decorate.  But when the Round Room stuff moved into the Activity Room, it became the Nursery again.

Even so, we thought quite a while about which room should be OUR nursery.  We agreed on the Nursery because it doesn't have an exterior door and has a smaller closet.

I'm not sure when exactly I envisioned our nursery, but my vision hasn't really changed much since, although I tried.  My first dream was a chair rail.  The rooms I saw online and in ads looked so nicely divided with chair rails and two colors.  But it seemed so hard, so I convinced myself we'd be fine with a border.  But I couldn't convince myself enough, and eventually I started researching how to install a chair rail.  I never thought it looked 'easy' but I thought it looked 'doable'.  I made a plan (a very detailed plan, unsurprisingly, including measurements, schedules, price estimates, work order, and resources.  There are bridge projects that don't have such organized planning).  Like any plan, it was adjusted along the way both as we encountered hiccups and as we learned, but at least it was a place to start!


Most of the information I read agreed on what we would need, so list in hand we headed to home depot.  Overall the project wasn't particularly expensive, we spent around 120 dollars all told at home depot for the materials and ended up with a few returns (coping tools, more on that later).

Actually, like all good projects we started with a hardy breakfast at Denny's, THEN to Home Depot.

Before
 

The pictures are a bit dark, I was too busy getting ready to work to focus on great pictures!

Here's a sneak peak of Gavin at our 'work station.'  I had intended to use our desk, but it didn't seem to be sturdy enough to handle all of the sawing that was necessary!

We encountered a few challenges

  1. In my planning, I had expected that chair rail was sold in 8' segments.  The rail we choose (to compliment the floor boards) was cut to purchase in the store.  Not a setback, but it did mean some quick recalculations on the floor of home depot!  One of my better ideas was labeling each piece with a number as we cut so when we got home we knew what went where. 
  2. Inside Corners.  In my research I had absolutely decided that coping was the only way to do corners. The method seemed easy enough and the results are said to be far superior to using miter (45 degree cuts) in the corners.  Maybe.  I'll never know.  It turned out to be a huge hassle and we decided to miter the corners.  They came out fine!
  3. Precision.  I'm a Bridge Engineer, so I absolutely understand the value of measure twice cut once.  Our measurements were right on, our equipment wasn't so exact.  Using a hand saw as opposed to an electrical saw made it a bit more challenging to cut to our very precise measurements.
  4. Outside corners.  I love our house and all of it's lovely softly rounded corners.  But trying to install molding isn't so easy on a rounded corner!  Instead of a quick 45 degree cut, we had to carefully measure out separate pieces to work around the corners.  It was even more challenging because our closet is inset in the wall with a few inches of drywall.  I probably didn't know that about our home until after this project!

Here comes the Rail!
It took us about 2 hours longer than I had anticipated to complete the project, but my time estimate was fairly rough.  I tried to space out the overall nursery completion schedule to give us plenty of time so it wasn't really a problem.

And we were incredibly happy with the results!


Overall, we were very happy with the results.  

My overall thoughts on the project is that it was about as difficult as I anticipated, although obviously we ran into challenges we weren't expecting.  We were able to borrow an electric saw which would have made the work much easier if we'd had it the entire time!  If we were going to do a bunch railing/molding, I'd buy one.

There are also a few things I would do different.  First, despite everything I read suggesting painting after installation, I think it would have been easier to paint first.  Also, we initially thought the rail looked fine with only minor areas of calking, however while painting, we realized the calking line was needed for a more finished look, so next time I'd calk right away.

Up next: Painting!